Why Everyone is Buying the Papier Photo Book (Full Review)
I've been using the Papier Photo Book for about six months now, and after making several copies, gifting one, and carrying another in my camera bag to show clients, I feel qualified to explain why people keep recommending it. In this review I'll walk you through my firsthand experience — the ordering process, print quality, physical feel, the editor, pros and cons, how it compares to other popular photo book options, and a straightforward buying guide so you can decide if it's right for your needs.
Introduction — Why I bought a Papier Photo Book
I wanted a tactile way to present my recent travel and portrait work beyond Instagram posts and digital galleries. I was looking for something that felt handmade, had clean design templates, and produced accurate color without being oversaturated. After a friend mentioned Papier, I ordered my first photo book as an experiment. Over six months I ordered three editions: a 40-page square coffee-table book for my living room, a smaller 24-page softcover for a friend, and a 60-page lay-flat book of landscape images for client presentations. What I found was a product that hits a sweet spot between design-forward aesthetics and solid print quality — with a few bumps along the way.
What the Papier Photo Book is (short)
The Papier Photo Book is a customizable photo book product offered through Papier's online editor. It focuses on minimal, modern templates, cover personalization (names, foil stamping, and linen or leather-like covers), and several paper options (matte, uncoated, and premium). In my experience it aims at photographers and everyday users who want elegant, design-led books rather than over-the-top templates.
Ordering experience & online editor
One of the first things I noticed was how friendly the editor is. It’s web-based and uses drag-and-drop. I uploaded high-resolution JPEGs directly from Lightroom exports and the interface let me place images, add white-space, and choose consistent margins quickly. The templates are intentionally restrained — grid-based layouts, full-bleed options, and text boxes that are easy to edit. I appreciated the preset spreads for travel albums, which saved me time arranging dozens of photos.
There were a few practical details worth calling out from my experience:
- Image handling: The editor warns if your images are low resolution, which helped me avoid soft prints. It doesn’t show an exact ICC preview — the screen preview is a reasonable representation but not a color-managed soft proof.
- Custom text and monograms: Adding foil-stamped initials on the cover was straightforward. I liked the typefaces offered — they feel refined and matched the overall aesthetic.
- Export & backup: I appreciated that you can save drafts and go back to edits. I did wish there was a simple PDF export of the full, print-ready spread before ordering so I could check for alignment in Acrobat.
- User-friendliness: As someone who sometimes struggles with clunky design tools, I found the editor intuitive. It’s not as advanced as professional layout software, but it’s faster for the typical photo book workflow.
Print quality and materials — what I liked and what could be better
After receiving my first book, I spent a long time flipping through it. The cover options felt premium — I chose a linen hardcover with foil text and it looked and felt elegant. The binding was solid and the spine aligned well. For the interior, I tried both the matte and premium paper options across different copies.
Shop the latest Cameras & Photography picks on Amazon.
See Deals →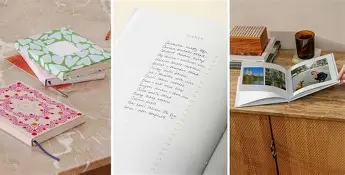
Here’s what I noticed:
- Color accuracy: Colors were true to my exports in the majority of cases. Skin tones were natural (which matters a lot for portraits) and landscapes retained dynamic range better than many consumer-grade services I’ve used in the past. I did find that very deep shadows occasionally lost some subtle texture, which is common on coated papers — the premium uncoated option preserved texture more but shifted contrast slightly.
- Sharpness and detail: Prints looked sharp with files exported at 300 ppi. When I deliberately uploaded smaller files (for comparison) the editor flagged them as low-res, and the resulting pages did look softer as expected. For small text or thin lines, I recommend vector or high-res raster elements to avoid pixelation.
- Paper feel: The matte paper felt modern and restrained; the premium option felt thick and luxurious, closer to a heavy postcard stock. The softcover option is perfectly serviceable for gifting and travel, though it’s less robust than hardcover.
- Binding options: I ordered a lay-flat edition for landscape panoramas and it performed well — panoramas printed across the gutter with minimal image loss. That said, extremely small details placed exactly on the central seam can still be slightly obscured, so I avoided placing critical subjects dead-center.
One thing that bothered me initially was a very minor misalignment on one copy where the text on the spine was slightly off-center. I contacted customer service, they were responsive, and they reprinted the book after I sent photos. That experience gave me confidence in their support, though I would prefer flawless first prints.
Use cases — who should consider a Papier Photo Book
In my experience, the Papier Photo Book is ideal for:
- Photographers who want a stylish portfolio or gift book without learning complicated layout software.
- Families creating keepsakes of trips, weddings, or newborn photos who value design-led templates.
- Design-conscious customers who prioritize cover materials and minimal typography.
It’s less ideal if you need heavy customization beyond what the web editor supports (extensive typography control or CMYK soft-proofing). For trial proofs and one-off test runs, though, its workflow is speedy and pleasant.
Pros & Cons
Pros
- Beautiful, modern templates that make photos look curated and intentional
- High-quality cover options — linen, softcover, and tasteful foil stamping
- Good color fidelity for portrait and landscape work
- Lay-flat binding option that works well for panoramas
- Intuitive web editor with helpful low-res warnings and easy layout presets
- Responsive customer service — reprint handled quickly when needed
Cons
- No built-in ICC soft-proofing in the editor — screen previews can differ from final print
- Minor chance of small alignment issues on tricky spine/text elements (rare, but it happened to me)
- Limited advanced typography and PDF proofing options compared to professional design software
- Premium paper choices add to cost — the most luxurious options can be pricey for large page counts
Comparison table — Papier vs a few alternatives (based on my experience)
| Feature | Papier Photo Book | Blurb (my experience) | Artifact Uprising (my experience) |
|---|---|---|---|
| Editor usability | Very intuitive web editor; great templates | Flexible (bookwright/plug-in), more control but steeper learning | Simple, design-forward; similar ease but fewer layout presets |
| Paper & binding options | Matte, premium, lay-flat; linen/softcover covers | Wide range including premium photographic papers and hardcover | High-quality recycled/linen options; strong lay-flat choices |
| Color fidelity | Good; natural skin tones and balanced saturation | Very good; pro options for photographic prints | Good; slightly warmer tones in some batches |
| Design aesthetic | Modern, minimal, editorial | Very flexible — from scrapbook to professional | Clean, premium, lifestyle-focused |
| Price (general) | Mid-range to premium depending on options | Wide range; can be budget to premium | Premium |
Buying guide — what I recommend you check before ordering
After several months of testing, here are practical tips I use every time I prepare a photo book. These are the steps that saved me headaches and improved final results:
Discover deals on Cameras & Photography — updated daily.
Shop Amazon →- Export at the right resolution: I export images at 300 ppi at the final print dimensions. The editor will flag low-resolution files, but it’s better to do the math in Lightroom or Photoshop first.
- Keep important details away from the gutter: Even with lay-flat binding, avoid placing vital subjects exactly on the center seam. A 5–10 mm safety margin on either side is a sensible precaution.
- Choose paper based on subject: I pick matte or uncoated for portraits because it renders skin more naturally; for landscape work with vibrant colors I choose the premium coated paper to retain punch.
- Soft-proof if color accuracy is crucial: Since the editor doesn’t provide ICC soft-proofing, do a test export and print a single sheet at a local lab if you need an exact match, or order a small proof book first.
- Decide on page count early: Papier charges incrementally by pages and paper type — consolidating images into fewer spreads can keep costs down. I rearranged and combined spreads to hit a sweet spot between flow and price.
- Use consistent edits: Batch-process color and contrast so that images maintain a cohesive look across the book.
- Proof thoroughly: Zoom in on the editor to check for alignment and text kerning, and use the preview mode to scan each spread. If possible, export a PDF for a second look.
Price and value — is it worth it?
Over three orders I experimented with different price points: the softcover book was the most economical and made a lovely gift; the linen hardcover with premium paper felt like a luxury object and cost substantially more. In my experience, Papier sits in the mid-to-premium range. You're paying not only for print quality but also for the design-forward covers and the ease of the editor. If you value a beautifully designed, tactile product and want something presentable without hours of layout work, I think it's worth the spend. If you're on a strict budget and want the absolute cheapest prints for mass distribution, it might not be the right choice.
Customer service & turnaround times
My first order took a little longer than expected due to a minor printing misalignment. I emailed customer support with photos, and they reprinted the book and expedited the replacement. The initial delay was frustrating, but their responsiveness and willingness to correct the issue left a positive impression. For normal orders, expect production plus shipping to take a couple of weeks depending on your region; during promotions or holiday seasons it may be longer. If timing matters, plan ahead and allow extra days.
Final thoughts — who should buy this?
After six months of use, I still reach for the linen hardcover I keep on my coffee table. I show it to clients, friends, and family, and people consistently comment on the cover and the restrained layouts. For photographers who want a stylish, design-centric book without spending hours in InDesign, the Papier Photo Book is a strong option. For photographers who need absolute color precision and advanced prepress controls, it might not replace a pro lab experience — but it's an excellent compromise for most personal projects and client proofs.
Conclusion
What I found was a photo book that balances design, quality, and convenience. The editor makes it easy to produce something that looks curated rather than thrown together, the materials feel premium (especially the linen and premium paper), and the printed images are consistently pleasing. There were small issues — a spine alignment hiccup and the lack of ICC soft-proofing — but responsive customer service and solid overall quality minimized the impact. In my experience, if you want a beautiful way to share your photography in print and you value aesthetics and ease of use, the Papier Photo Book is worth trying.