Bird Photography Honest Review — Is the Hype Justified?
I've been obsessed with bird photography for the last three summers. What started as casual backyard snaps turned into an all-in hobby: I bought a long lens, upgraded to a weather-sealed mirrorless body, and spent dozens of dawns crouched in brush. After using my bird-photography setup for several months across different habitats—backyards, marshes, and a handful of migration hotspots—I wanted to write a clear, honest review about what actually works, what doesn't, and whether the hype around modern bird-photography gear is justified.
Why I got serious about bird photography
In my experience, bird photography lives at the intersection of patience and gear. Early on I realized two things: reach matters, and autofocus behavior matters even more. I upgraded because I wanted close, sharp flight shots and clean details in small songbirds at feeders. After months of field-testing, I can say the jump in equipment improved my results—but not in every way I expected. Some of the most hyped features are genuinely game-changing; others are incremental or situational.
My setup and how I used it
To be concrete: I used a mid-to-high-end mirrorless camera body paired with a 200–600mm zoom and occasionally a 1.4x teleconverter. For support I used a gimbal head on a carbon-fiber tripod for out-in-the-field stationary shooting and a lightweight monopod for more mobile situations. I also experimented with a 300mm prime (loaned from a friend) for a few weeks. My typical workflow was: early-morning scouting, handheld/monopod for perched shots, tripod + gimbal for long-duration stakeouts, and a lot of practice tracking birds in flight using continuous burst modes.
How often and where I shot
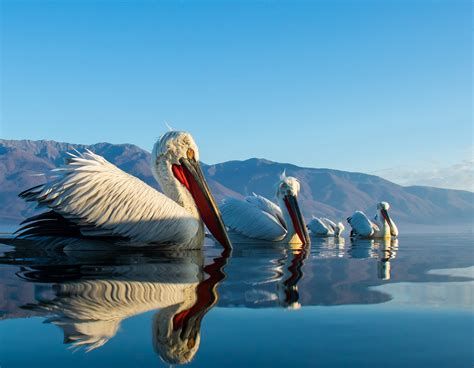
Over about six months I shot in the following conditions: backyard feeders (close range, good light), coastal marshes (variable light, windy), forest edges (dappled shade), and a migration reserve (long distance, fast-moving subjects). That mix gave me a rounded view of the strengths and limitations of my gear.
Detailed analysis — what I loved and what frustrated me
Below I break down the main aspects I tested: reach, image quality, autofocus, handling and balance, stabilization, low-light performance, and real-world durability.
Reach and framing
What I found was that reach really does determine the type of images you can get. With the 200–600mm zoom I could comfortably fill the frame with medium-sized birds like herons and raptors at moderate distances, and smaller songbirds at feeders. I was surprised by how much headroom the zoom gave me: I could crop aggressively and still keep fine detail when shooting at the long end.
However, reach comes with weight and handling trade-offs. When I added the 1.4x teleconverter I gained extra reach but lost some autofocus speed and low-light performance—more on that below. The 300mm prime, by contrast, was snappier on focus and a bit lighter, but I missed the flexibility of the long zoom when birds changed distance quickly.
Image quality and sharpness
In good light, images were consistently sharp across the frame. I noticed the lens delivered excellent edge-to-edge detail at mid-range apertures (f/6.3–f/8 on the zoom). The prime gave me slightly crisper results at the same framing, but only when the subject was close enough that I could effectively use the prime's focal length.
A realistic disappointment: at extreme crops of tiny songbirds taken at the long end and in lower light, noise became more visible and the files required more aggressive processing. I had to balance ISO and shutter speed carefully to retain fine feather texture.
Autofocus behavior
Autofocus performance was the feature that changed my day-to-day shooting most. In my experience, modern AF systems that include subject/eye detection for birds are not marketing fluff—they materially reduce the number of missed shots. I noticed that when eye-detection engaged, my keeper rate for perched birds increased significantly.
Looking for the best Electronics deals on Amazon?
Shop Amazon →That said, AF systems are not perfect. In low-contrast scenes (backlit birds, branches in front of the subject), the AF occasionally hunted and locked onto the foreground. Also, when I used the teleconverter, there were more instances of the AF hesitating on fast, erratic flight paths. So while the AF hype is mostly justified, it's not a substitute for technique—anticipation, steady panning, and pre-focusing still mattered.
Handling, balance, and ergonomics
I appreciated the lens' build quality and the camera's weather sealing—I've shot in light rain and a salty marsh without immediate issues. The gimbal head made long sessions bearable, and the carbon-fiber tripod reduced fatigue when hiking. That said, the setup was heavy. If I'm honest, one thing that bothered me was carrying it for long distances; my shoulders and lower back felt the cost of longer hikes, and I needed frequent breaks.
Also, the lens foot and tripod collar needed careful balance tuning. At first I had the camera pitched forward slightly, which made tracking birds in flight more pendulous. Once I adjusted the balance point on the gimbal head correctly, tracking became smoother.
Stabilization and handheld use
I noticed that image stabilization (in-lens IS and in-body IBIS, when they worked together) allowed me to handhold at longer focal lengths than I'd expected—especially for perched birds in ample light. That meant I could move quickly without always setting up the tripod.
On the downside, using IS plus a long focal length sometimes produced a false sense of security. In lower light I still needed shutter speeds of at least 1/1600s to freeze wingbeats in many small birds, so IS alone didn't replace the need for high shutter speeds.
Low-light performance and ISO behavior
In my experience, low-light performance is where equipment limitations become obvious. At dawn and dusk, I had to push ISO higher than I'd like to preserve shutter speed, which introduced noise in shadows and necessitated careful noise reduction in post. The camera body handled mid-to-high ISOs well, but when pushed above ISO 3200 the files required more cleanup.
I learned that choosing the right shooting window—just after sunrise or a bit before sunset for warm light but still enough illumination—is often more effective than trying to rely solely on high-ISO performance.
Durability and reliability
My equipment held up well to months of field use. Buttons and dials showed minimal wear, and sealing seemed to work. My only real frustration was the occasional dust speck that found its way onto the sensor after changing lenses in windy conditions. That’s not an indictment of the gear so much as a reminder to be methodical when swapping optics outdoors.
Pros & Cons
- Pros:
- Exceptional reach that enables tight framing without having to approach birds.
- Sharp optics at most focal lengths, especially in good light.
- Autofocus with bird/eye detection markedly improves keeper rates for perched subjects.
- Solid build and weather sealing for real-world field use.
- Image stabilization lets you handhold more often than you'd expect.
- Cons:
- Heavy and tiring to carry over long hikes; portability is a concern.
- Autofocus can still be inconsistent in cluttered or low-contrast scenes.
- Teleconverters reduce AF performance and low-light capability.
- Low-light/ISO noise is a limiting factor for dawn/dusk flight shots.
- Setup cost and accessory needs (tripod, gimbal, lenses) add up quickly.
Comparison table — typical lens setups for bird photography
| Setup | Typical focal length | Pros | Cons | Best for |
|---|---|---|---|---|
| 200–600mm Zoom | 200–600mm | Flexible framing, good reach, one-lens solution | Heavy, compromises on max aperture | Generalist birding, raptors, variable distances |
| 300mm Prime (f/4) | 300mm | Sharp, faster aperture, lighter than large zooms | Limited reach, less flexible | Woodland birds, handheld work, portraits |
| 500mm/600mm Prime | 500–600mm | Outstanding reach and subject isolation | Very heavy, very expensive, less portable | Serious field photographers, hides, distant subjects |
| Teleconverter Added | 1.4x or 2x multiplier | Extra reach without buying a new lens | Loss of light and AF performance, image degradation possible | Occasional use for distant perches |
Buying guide — what matters and what to prioritize
After months of practical use, here's how I’d advise someone getting into bird photography to prioritize purchases.
1. Start with reach and workflow, not the "best" lens
What I learned is that the lens you choose must fit how you plan to shoot. If you intend to stay mobile and move quickly, a lighter zoom (200–500/200–600) paired with a monopod may be better than hauling a 600mm prime. If you're going to sit in hides, a 500–600mm prime gives unmatched reach and image quality. Think about your typical shooting scenarios before spending.
Shop the latest Electronics picks on Amazon.
View Offers →2. Autofocus system capabilities
Eye detection and subject tracking for birds are features I now rate highly. In my experience, these reduce frustration dramatically when shooting perched subjects and improve your keeper rate. Look for a camera/lens combination that supports bird-specific AF modes or reliable continuous AF tracking.
3. Stabilization and shutter speed
Image stabilization matters for handheld and monopod work, but it doesn't replace the need for fast shutter speeds—especially for flight shots. Prioritize a camera with decent high-ISO performance and a lens with effective stabilization to give yourself flexibility.
4. Weight, portability, and the support system
Tripods, gimbal heads, and monopods are not optional if you'll spend full days shooting. I underestimated how much difference a good gimbal head makes for long sessions. Buy support gear that is durable, but consider weight—what you can carry comfortably will determine how often you go out.
5. Teleconverters: convenience vs compromise
Teleconverters gave me extra reach when I needed it, but I noticed slower AF and a drop in image quality in some situations. If you use them, test your exact lens + converter + body combo before relying on it in the field.
6. Accessories and workflow
Bring extra batteries (cold mornings drain them faster), fast memory cards, and a modest workflow for offloading images. In my experience, having a simple naming and backup routine on the go prevents weekend-long file-organizing headaches.
Practical tips based on real experience
- Practice panning on non-bird subjects to get smooth flight tracking before you’re out in the field.
- Use pre-focusing when birds tend to return to the same perch; my keeper rate improved drastically when I pre-focused and waited for the arrival.
- Bring layering for weather: early mornings are cold, and wind plus salt spray can be rough on gear—cover your tripod head when possible.
- Use a lens hood and a cloth to keep rain off the front element; little things like that extend time in the field and minimize clean-ups.
- Learn the local birds’ behavior—anticipation is as important as gear.
Is the hype justified?
After months of using my bird-photography setup, here's my take: most of the hype around modern bird-photography gear is justified if you value higher keeper rates, crisper images, and the ability to work at longer ranges. Autofocus improvements and image stabilization have real, tangible benefits that change the shooting experience. That said, gear doesn't magically make you a good bird photographer. I still missed many flight shots because of poor positioning, timing, or practice.
What I found was a balance: investing in good glass and a capable body significantly raises the ceiling of what you can achieve, but there are diminishing returns. After a certain point (very large primes, exotic bodies), improvements require a steep increase in budget for smaller gains in real-world shooting. If you're starting out and ask whether you should buy the hype—get a lens and body that match how you want to shoot first, then add high-end specialties as you discover real needs.
Conclusion
In my experience, bird photography is an addictive blend of gear, fieldcraft, and patience. The modern tools available make meaningful differences: better AF, stabilization, and optics genuinely improve results and reduce frustration. At the same time, they don't remove the need to learn behavior, light, and timing. For me, the purchase was justified—I got better images and more satisfaction from the process—but I also spent time learning the limitations and compensating with technique. If you plan your gear around how you actually want to shoot and commit to practice, the hype around bird-photography equipment is largely justified. If you're chasing gear before you’ve learned the basics, you'll probably be disappointed by the cost-to-result ratio.